

Manage Your Email Campaigns in Wajooba
Overview
Ready to connect with your audience and grow your business? This guide will walk you through setting up powerful email campaigns in Wajooba, from initial integration to sending and tracking. You'll master reaching your customers with ease and confidence!
Prerequisites
- A Wajooba account
- Access to a verified domain (e.g., your business website's domain)
- Login credentials for your domain's DNS provider (like Cloudflare)
Steps
Step 1: Set Up Your Email Integration
First, let's get Wajooba connected to send emails! Head over to the 'Settings' section, then click on 'Integrations', and finally, select 'Email Campaign'. You're doing great!

Step 2: Enter Sender Details
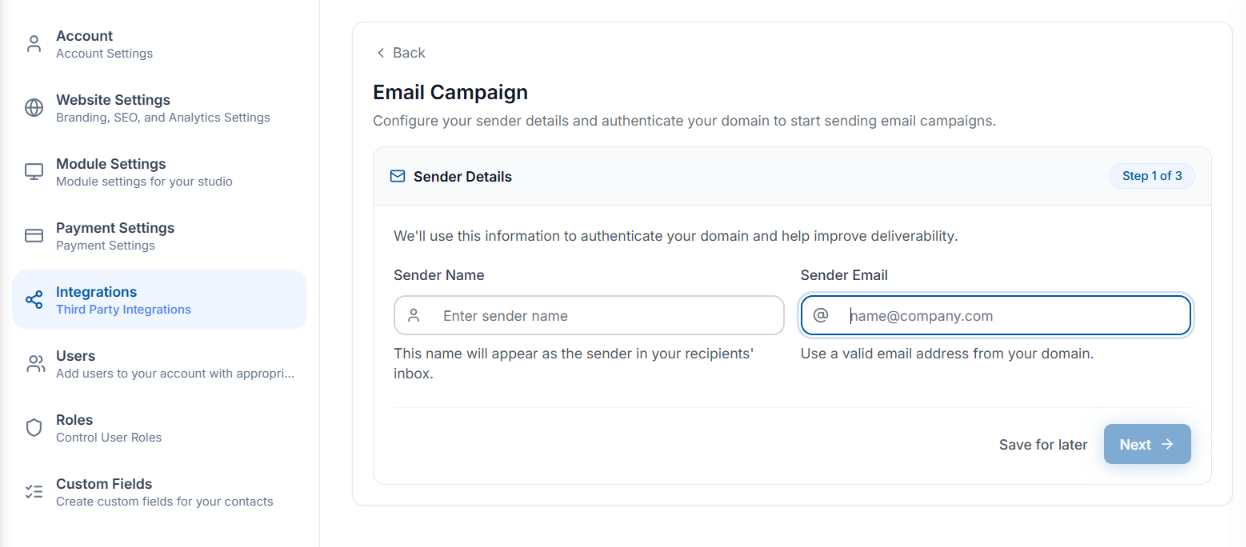
Next, you'll need to input a 'Sender Name' (this is what your recipients will see) and a 'Sender Email Address'. It's super important that this email belongs to your verified domain for successful delivery. Once you've filled those in, click 'Next'.
Step 3: Copy Mailgun DNS Records
Wajooba will now generate the necessary Mailgun DNS records for you. Don't worry if these look a bit technical! Your mission here is to carefully copy all of these records – you'll need them for the next step. Keep them handy!

Step 4: Add DNS Records to Your Domain Provider (e.g., Cloudflare)
Now, open a new tab and log in to your domain's DNS provider (like Cloudflare). Go to your domain's settings and find the 'DNS' section. Here, you'll add the records you just copied from Wajooba. You'll typically add entries for SPF, DKIM, MX, and CNAME records if provided. Make sure each record type and value is entered precisely!
Step 5: Save & Verify DNS Records in Wajooba
After adding and saving the records in your DNS provider, head back to Wajooba's Email Integration screen. Click the 'Verify DNS Records' button. Wajooba will check that everything is correctly set up. Once verification succeeds, Mailgun is automatically configured, and your email integration is ready to roll!
Step 6: Leverage AI to Craft Your Campaign Content (Optional but Powerful!)
Want to save time and get amazing email copy? Click on 'Knowledge Base' within Wajooba. You can add your documents, website links, or any data here. This helps the AI generate more accurate and personalized responses for you. Then, enter a prompt describing your email's purpose and hit 'Generate'. Just like that, your AI-generated title, subject, and full campaign body are ready!

Step 7: Create Your Email Campaign
Let's start building your campaign! You'll need to set the 'From' field (your sender name and email). For the 'To' field, you have options! You can send to a specific contact, or use a 'Tag' to send in bulk to everyone linked to that tag. For bulk sending, simply select the desired tag. We'll start by selecting a specific contact for now.

Step 8: Choose Your Campaign Format: Text or HTML
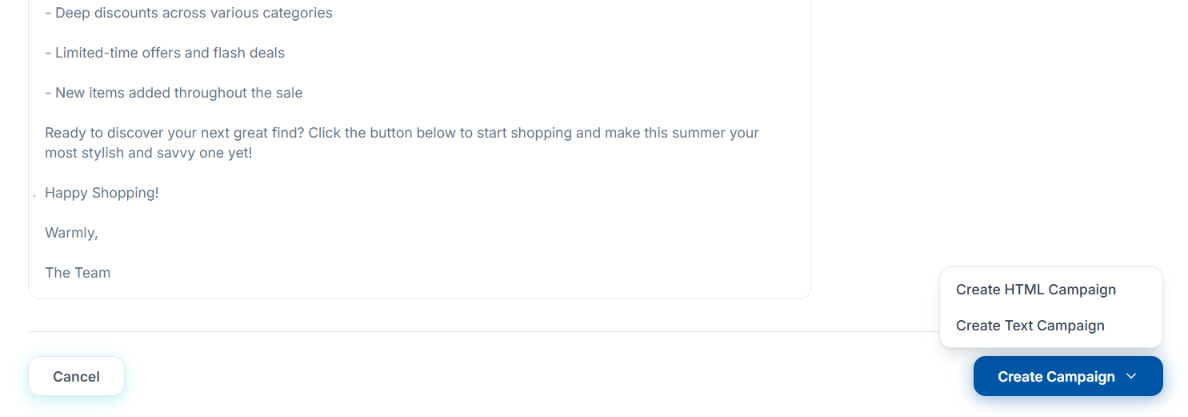
Now, decide how you want your email to look! You can choose between a simple 'Text' campaign or a visually rich 'HTML Campaign'. If you select 'HTML', Wajooba provides a ready-made template to get you started.
Step 9: Customize Your HTML Campaign (If Applicable)
If you chose an HTML campaign, this is where you make it shine! You can easily edit any section, upload new images (or pick existing ones), switch between different styles, and even change the color theme to match your brand. Get creative and make it look fantastic!
Step 10: Save Your Campaign
Once you're delighted with your email's content and design, hit the 'Save' button. Your campaign is now beautifully crafted and ready for the next step!

Step 11: Send or Schedule Your Campaign
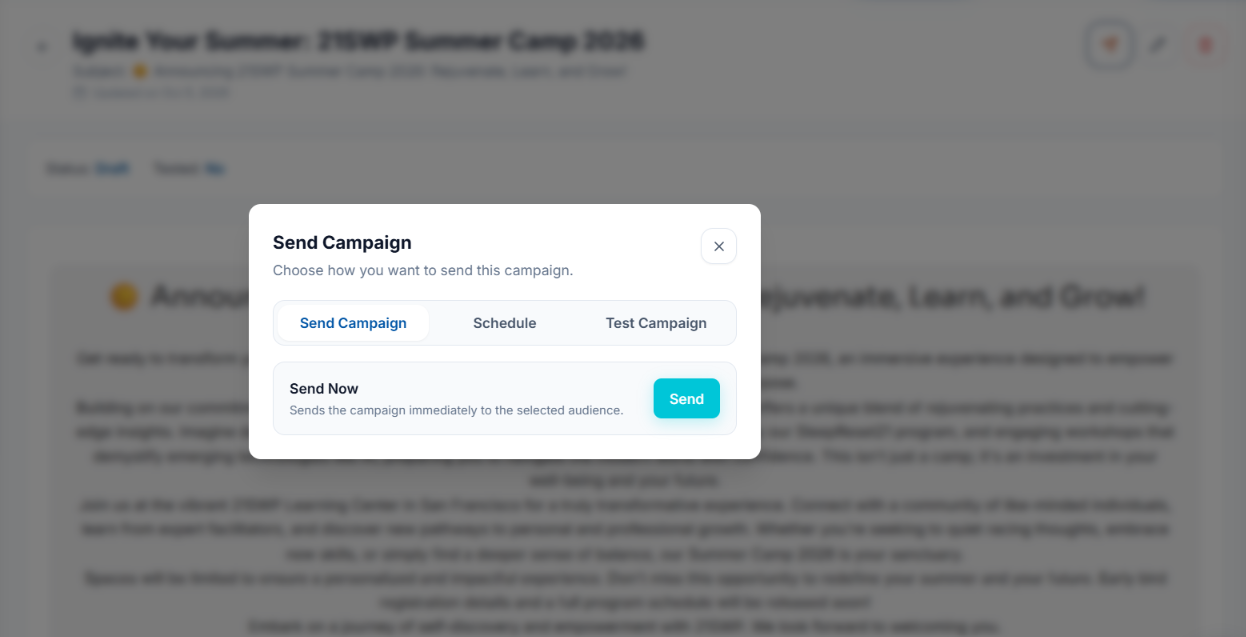
It's almost time to send! Click 'Send Campaign'. You'll see three helpful options: 'Send Immediately' to launch it right away, 'Schedule' it for a future date (perfect for planning ahead!), or 'Send a Test Email' to yourself first. We highly recommend sending a test to ensure everything looks perfect before your audience sees it!
Step 12: Track Your Campaign Performance
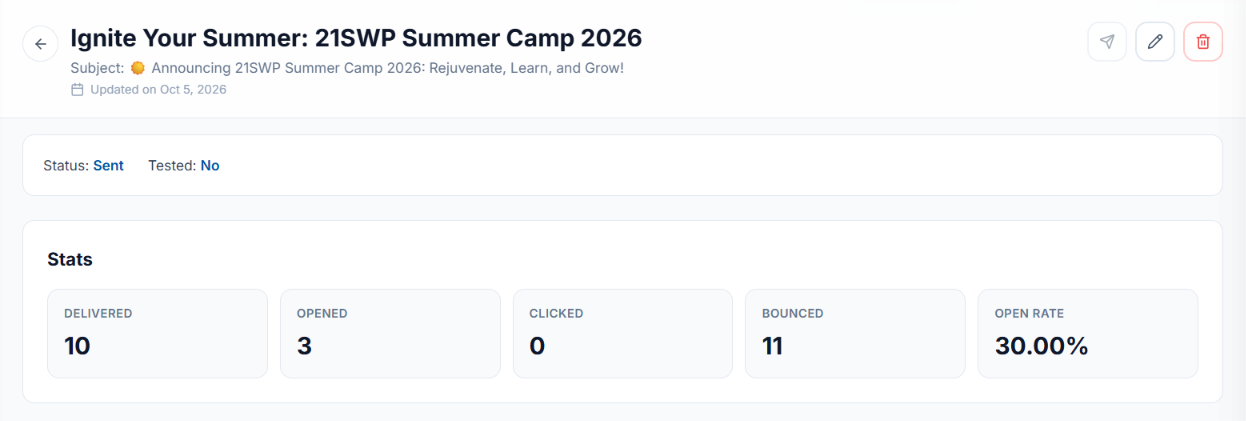
Once your campaign is sent, you can easily track its status and see how it's performing! Wajooba provides clear statistics on how many emails were delivered, opened, clicked, and even bounced. This valuable insight helps you understand what's working and how to improve future campaigns. You've got this!
Tips & Best Practices
- Always use a verified domain for your sender email to ensure high deliverability and avoid spam filters.
- Take advantage of Wajooba's AI content generation to quickly draft compelling email copy and save valuable time.
- Before sending to your entire audience, always send a test email to yourself to check formatting, links, and overall appearance.
- Utilize tags for bulk sending to efficiently segment and target different parts of your audience with relevant content.
- Don't be afraid to customize the HTML templates! Personalizing your emails helps them stand out and resonate with your subscribers.
Troubleshooting
If your DNS records aren't verifying, double-check that you've copied all records correctly and that there are no typos. DNS changes can sometimes take a little while to propagate across the internet, so give it an hour or two and try verifying again. If emails aren't sending after integration, ensure your domain is fully verified with Mailgun and your sender email address is valid. For AI-generated content issues, try refining your prompt or adding more relevant data to your Knowledge Base.
What's Next
Now that you're a pro at sending campaigns, dive into analyzing your campaign reports! Use the insights on opens, clicks, and bounces to refine your email strategy, improve your content, and plan even more successful campaigns. Keep nurturing your audience and watching your business grow!
Learn More
- Wajooba Help Center: Email Campaign Setup
- Understanding DNS Records for Email Delivery
- Mailgun Documentation: Domain Verification Guide
- Best Practices for Engaging Email Marketing
Related Articles
- Growing Your Email List Organically
- Crafting Irresistible Email Subject Lines
- Segmenting Your Audience for Maximum Impact
- The Power of Personalization in Email Marketing
Was this article helpful?
Related articles
Still need help?
Can't find what you're looking for? Our team is happy to help.